Yes, friends, this is my last post on Holly Sews and Crafts. No weeping, please, we all knew this was just a place for me to practice writing and blogging. Now it's time to FLY, yay! Please find me at my new blog where my first post is already waiting for you. It's soon to be followed by a lot more fun things, such as twitter, facebook, and even an etsy shop! All kinds of fun things are waiting in the wings, so take the first step with me and follow me at the Grass Floor Stitchery! Hooray!
<3,
Holly
Wednesday, February 29, 2012
Wednesday, February 22, 2012
Welcome Back, Holly!
Well, after my, ahem, hiatus... I'm back. What have I been doing, you might be thinking. I've been brainstorming. And marinating. And stewing. And coming up with all sorts of awesome ideas for us! By us I mean you, my reader, and me. We're crafting buddies. Am I wrong? I've also been making stuff, but just not blogging about it. For shame! The first rule of crafting nowadays, it seems, is "Thou shalt not craft without blog."
Speaking of crafting buddies, my "analog" group (as opposed to "digital," that's you), Escape Artists, will be losing a member this month. My mom, Leta Jones, will be moving back to Arkansas. That leaves Tammi, Sherry, and me. We are sad. But I hope we can continue crafting across two states.
 This is my finished product.
You want to make one too? It's pretty easy.
Speaking of crafting buddies, my "analog" group (as opposed to "digital," that's you), Escape Artists, will be losing a member this month. My mom, Leta Jones, will be moving back to Arkansas. That leaves Tammi, Sherry, and me. We are sad. But I hope we can continue crafting across two states.
For our final foursome craft night, we all worked on en caustic creations. En caustic art is art made with melted wax. For our wax component, we used crayons. For the heat component, we used hair dryers. We all came up with different end products. I made an en caustic color wheel, using all 48 Crayola crayons in my brand new box.

You want to make one too? It's pretty easy.
- First, go buy a canvas board size 16x20, and a box of 48 crayons. You'll want to get brand new crayons to get the best effect. Once you get home, prepare a work surface with newspaper or a cheap throw-away table cloth.
- Dump out all the crayons and arrange them in rainbow order, setting the black, white, grays, and browns aside.
- Then, get out your trusty hot glue gun (you can buy a craft-size one for about $4 or $5) and start with the red crayon. The color wheel I made is slightly off center on the canvas because I set all the browns by themselves off to the side. So mentally divide your canvas into two sections. One section will take up about four-fifths of the canvas and the other will be one-fifth. Glue that red crayon to the top center of the big section. This is the starting point for your wheel.
- Imagine the wheel is a big circle that is divided into equal thirds. The sections are arranged so that they form an upside-down "Y" inside the big circle. The red is the stem of the "Y" and the blue is the left-hand branch of the "Y" and the yellow is the right-hand branch.
- Once you've got your primary colors glued on, fill in between the red and yellow with all the red-oranges, peaches, oranges, and yellow-oranges from your rainbow. The red-oranges should go towards the red, and the yellow-oranges should go towards the yellow. The orange crayon should be somewhere in the middle, and the peaches can be somewhere in the middle too. It's up to you where best to put them, use your own sense of color to guide you.
- Fill in between the yellow and blue with all the yellow-greens, greens, and blue-greens. Once again, use your own sense of color as guidance, but the blue-greens should go towards the blue and the yellow-greens should go towards the yellow, with the green in the middle.
- Fill in between blue and red with all the purples and pinks, with more bluish purples going towards the blue and the pinks next to the red. This should take care of all your colored crayons, except for the blacks, whites, and browns you set aside earlier. If any colors didn't fit in, don't worry, throw them into your kids' crayon stash and forget about them. As long as there are no gaps in your circle, it's fine!
- I glued the white, grays, and black sideways inside my color wheel, and my browns vertically in the smaller section to the side of my wheel. Glue the browns with the points downwards, they will melt better.
- Finally, take out your hairdryer from its drawer in the bathroom. Plug it in near your covered work surface and start applying heat to your crayons. I turned my canvas in all directions as I applied heat only to the crayons whose tips were pointing towards the floor at the time. That is how I got the outward-sprawling pattern of my melted wax. For the whites and grays in the center, I just kind of let them mix in with all the other colors/directions. For the browns out to the side, I only wanted them to drip downwards on the canvas, so I didn't turn the canvas while I "dried" them with the hairdryer.
Wednesday, August 3, 2011
Road Trip to Northwest Arkansas
Last weekend I got in my car all by my little old self and drove 6.5 hours to Springdale, Arkansas, where my wonderful aunt Lana lives. She had a very special sewing cabinet for me there. It belonged to my grandmother so it was well worth the drive!

On the way there, I tried to use my new Roadside America app for iPhone to find quirky things to look at. But after passing several without seeing them, I decided it would be better for the way back when not under a time constraint. But looking for them made me notice a sign for a thing that called itself an Amish Store. That sounded fun, so I kept looking for the signs.
I was trying to guess what kind of building an Amish Store would be in. I thought it would be in the most functional type of building and least decorative type I could imagine, so I guessed it would be in a pre-fabricated building or trailer. I was right! Alas, I do not have a photo to prove it. I should. I'm sorry. I wasn't thinking.
I was too worried about my attire to think about the blog! Because the Mid-West/Mid-South is trapped in something I heard called a "heat dome," I was driving in a hot pink, strapless dress. (My catchphrase for the summer is, "It's too hot to wear anything else!")

I didn't know if I would encounter actual Amish working in the store, but I didn't want to be asked to leave (a la the woman in Oregon shopping in a bikini) before I snatched up my share of their home-baked goodness. So I rummaged in my suitcase for a little sweater (YES, it was too hot for a sweater!) and put it on in the parking lot.
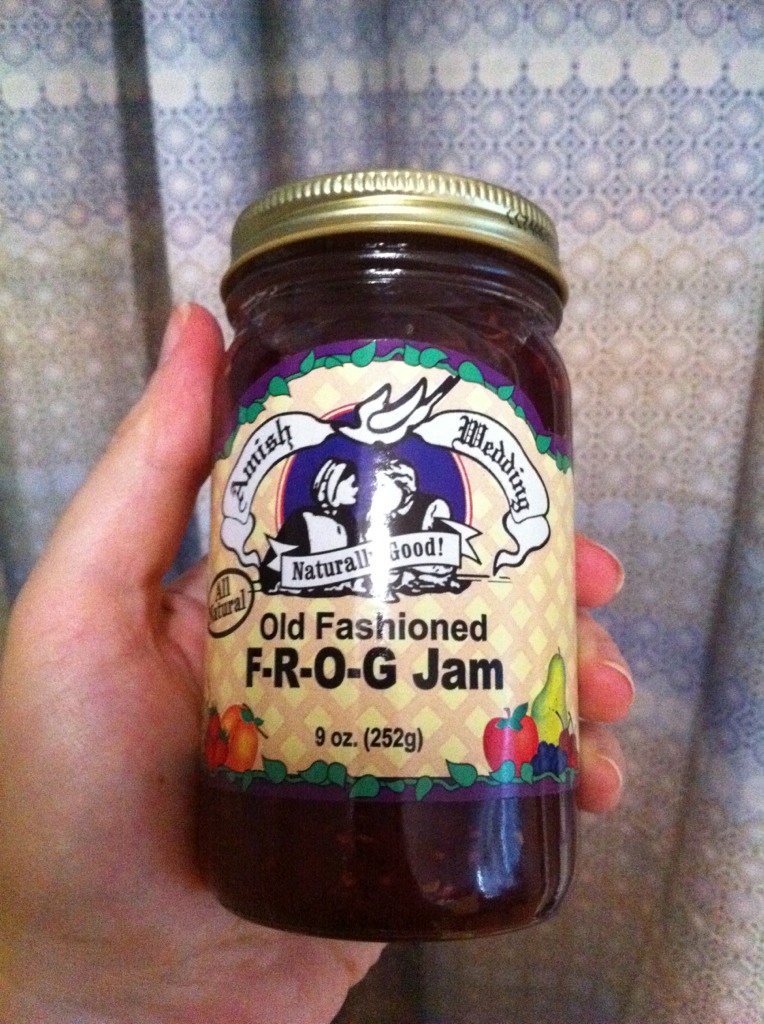
The nice lady in the store (she wasn't Amish) offered me a bucket. I thought she was trying to sell me the bucket so I declined. I tried the mystery fudge but couldn't guess what it was. I ended up buying three kinds of popcorn kernels and something called F-R-O-G jam. Fun!

I had a great time with Lana and she also did something else amazing. She bequeathed to me ALL of my grandmother's unfinished quilt blocks, along with her scraps of fabric and some other cool things to remember her by. I showed it to my mother and had to give some of it up, but that's ok. The little red fingertip towel with the squaredancers on it she wanted so I couldn't say no. I kept the weird egg-utensil crafty thing made by one of her children in Vacation Bible School. It had hung in her closet forever with diaper pins on it. Apparently, you just never know when you're going to need a diaper pin. <3
I am so touched to have been given these things. I can't wait to learn how to finish quilts. I know just the place to figure it out, one of my new favorite stores, The Berry Patch in Fort Worth. Also, my other favorite store, The Cabbage Rose has a hand-quilting class that I want to try. Can anyone please give me the gift of more hours in the day? That would be great.
Those things alone made the trip worth taking, but I also have a dearie friend who lives in a town nearby, so on Saturday I hopped on over to her house. She's about five months pregnant and she's the one I made the nursery mobile for. The nursery is still an office at the moment, so we hung the little birdies in her bedroom window. I'm glad they have a home, but when I got back I missed them hanging from my ceiling fan in my little loft apartment!

I have to give credit to Stephen for tying the darn things to the hoop. I just knew they wouldn't hang straight or would give me an anxiety fit if I did it. He did a great job. No, he's not eating the bird! Thanks baby!
Oh yeah, on the way back I did find those quirky things! One I even stopped for, AND got a photo. It was in Oklahoma, and it's a barbeque grill that looks like a revolver. But of course!


On the way there, I tried to use my new Roadside America app for iPhone to find quirky things to look at. But after passing several without seeing them, I decided it would be better for the way back when not under a time constraint. But looking for them made me notice a sign for a thing that called itself an Amish Store. That sounded fun, so I kept looking for the signs.
I was trying to guess what kind of building an Amish Store would be in. I thought it would be in the most functional type of building and least decorative type I could imagine, so I guessed it would be in a pre-fabricated building or trailer. I was right! Alas, I do not have a photo to prove it. I should. I'm sorry. I wasn't thinking.
I was too worried about my attire to think about the blog! Because the Mid-West/Mid-South is trapped in something I heard called a "heat dome," I was driving in a hot pink, strapless dress. (My catchphrase for the summer is, "It's too hot to wear anything else!")

I didn't know if I would encounter actual Amish working in the store, but I didn't want to be asked to leave (a la the woman in Oregon shopping in a bikini) before I snatched up my share of their home-baked goodness. So I rummaged in my suitcase for a little sweater (YES, it was too hot for a sweater!) and put it on in the parking lot.
The nice lady in the store (she wasn't Amish) offered me a bucket. I thought she was trying to sell me the bucket so I declined. I tried the mystery fudge but couldn't guess what it was. I ended up buying three kinds of popcorn kernels and something called F-R-O-G jam. Fun!
I had a great time with Lana and she also did something else amazing. She bequeathed to me ALL of my grandmother's unfinished quilt blocks, along with her scraps of fabric and some other cool things to remember her by. I showed it to my mother and had to give some of it up, but that's ok. The little red fingertip towel with the squaredancers on it she wanted so I couldn't say no. I kept the weird egg-utensil crafty thing made by one of her children in Vacation Bible School. It had hung in her closet forever with diaper pins on it. Apparently, you just never know when you're going to need a diaper pin. <3
I am so touched to have been given these things. I can't wait to learn how to finish quilts. I know just the place to figure it out, one of my new favorite stores, The Berry Patch in Fort Worth. Also, my other favorite store, The Cabbage Rose has a hand-quilting class that I want to try. Can anyone please give me the gift of more hours in the day? That would be great.
Those things alone made the trip worth taking, but I also have a dearie friend who lives in a town nearby, so on Saturday I hopped on over to her house. She's about five months pregnant and she's the one I made the nursery mobile for. The nursery is still an office at the moment, so we hung the little birdies in her bedroom window. I'm glad they have a home, but when I got back I missed them hanging from my ceiling fan in my little loft apartment!

I have to give credit to Stephen for tying the darn things to the hoop. I just knew they wouldn't hang straight or would give me an anxiety fit if I did it. He did a great job. No, he's not eating the bird! Thanks baby!
Oh yeah, on the way back I did find those quirky things! One I even stopped for, AND got a photo. It was in Oklahoma, and it's a barbeque grill that looks like a revolver. But of course!
Monday, July 18, 2011
Porch swing pad, porcupine pin cushion, and pacifier bowl

This week I made a porcupine pin cushion that I found on another blog, Prudent Baby. This link will take you straight to the directions for the porcupine. I made this one to be my boyfriend's daughter's first pin cushion. All she will do with it is push the pins further into the cushion, one by one. I can't wait to teach her to sew!

Also in the last two weeks, I have crocheted and felted a small bowl. It turned out to be just the right size to hold a pacifier, so that's what it's doing on the ledge above my kitchen sink. Here's a photo of it without the pacifier in it. I will post directions to crochet the bowl below. Woohoo, my first how-to!

Finished felted size: 3 5/8"diameter x 2 1/2"height
Materials: 1 skein of at least 50% wool yarn. (I used 80% wool, 20% alpaca!)
1 "I" crochet hook (5.50mm)
*Crochet pattern:
Round 1: ch 4, 12 dc in 4th ch from hook, sl st in top of ch-3 joining to beginning of round: 12 dc
Round 2: ch 3, 2 dc in each dc around, sl st in top of ch-3: 24 dc
Round 3: ch 3, (2 dc in next dc, dc in next dc) around, sl st in top of ch-3: 36 dc
Round 4: ch 3, (2 dc in next dc, dc in next dc) around, sl st in top of ch-3: 48 dc
Round 5-6: ch 3, dc in each dc around, sl st in top of ch-3: 48 dc
*Disclaimer: This was my first effort at crocheting a bowl, and I'm not sure that I did it exactly as stated. But the general idea was to build each increasing row at the rate of 1.5x, and then go straight up once the desired width was reached.
Felting instructions:
I have never felted anything before, so I read up online first. I found an excellent guide at lusciousgracious.com. But basically all you need is a (top-loading) washing machine, a timer, a zippered pillowcase or a pillowcase with safety pins, a pair of jeans and a couple of tennis balls for agitation. And some mild dish soap or delicate fabric soap.
1. Throw the item to be felted into the zippered pillowcase and zip shut. (Ultra-important, to protect your washing machine from all the tiny fibers that will come out of the yarn)
2. Start wash with pillowcase, jeans, tennis balls, and less than a TEASPOONful of mild soap. When the agitation starts, set the timer for five minutes.
3. Check the item for felting signs every five minutes until you see it starting to felt. Then check it every two minutes. (You may need to re-start the agitation process). It happens quick, so don't walk away! When the item is as felted as you wish, take it out of the machine and hand-rinse with cold water, being careful not to crease it.*
4. Shape it and allow it to air-dry. I shaped my bowl around one of my dog's squeaky balls that was actually the same ball I used in the washing machine. It is slightly larger than a tennis ball. If you use that method of shaping, be sure to get it centered and use empty drinking glasses or something else to set around the ball so it doesn't roll. If not, your bowl will be a tilt-y bowl like they serve you at my favorite restaurant. But that is how I got that oh-so-cute shape.
(Another tip: If you do shape it around a ball, take the ball out when it is mostly dry and then, without distorting the lip of the bowl, drop it onto a flat surface from a height of a few inches to get the bottom flatter.)
*I actually forgot and completely left out the hand-rinsing with cold water step. If it's not a piece of clothing that you're felting, it probably doesn't even matter if there's suds in it.
That's it! In this summer heat, it probably won't take long to dry. If you're doing this in a less dry climate, overnight should do the trick.
Good luck, and P.S. The felting process will go so much quicker if you're using a super cute ice cream cone timer like the one I used!

Tuesday, July 5, 2011
Nursery Mobile and First Job!
This week I have been working on a mobile for my friend. Little yellow and white birds flying above the crib, so sweet! I've finished two, five more to go!

I had to stop the bird-making factory for a while and make another beach towel tote for my dad to give my sister for her birthday. I really like this one so I'm posting a picture of it, too. He's taking it to Arkansas along with the porch swing pad I made for her!


I made the porch swing pad out of laminated cotton, so it'll be great for outdoors. I'll try to get a picture of it once it's on the porch!
Oh yeah, my dad paid me for the bag, so it's my first real job and first sale together! Yay!
Friday, June 24, 2011
Baby Burp Cloths Trio
I made this trio of burp cloths for my dear friend Katie, who's due on Halloween! Hence the nickname, Boo. Boo's gender is as yet inconclusive, so she's liking yellow and white for his/her room.
The burp cloths were super fast and easy to make, and I even designed one myself! I'll let my readers guess which one it was.
Here's a photo, and below, a bonus photo of the beach towel tote in use! I even made a second one of those yesterday afternoon for use by my boyfriend, Stephen. Yes, that's me in the swimsuit coverup. I know this is the internet and all, but I have to be modest!


P.S. We had a great time at the pool!
Wednesday, June 22, 2011
WEIGHTED Tie-ons for Beach Towel Tote!
This morning I whipped up the tie-ons as I said I would yesterday, but got caught up in other things. I made them 1"x8". They are out of the same fabric I made the bag out of, and they look great! I even slipped in about three pennies before I sewed the final seam to make them heavy.
The fun thing about making them was using my new rotary cutter to cut the strips. It's an Olfa, so hooray for safety features! Their self-healing mat was amazing, too.


Tomorrow, the pool! I'll be sure to post a photo of the beach towel tote "in action!"
The fun thing about making them was using my new rotary cutter to cut the strips. It's an Olfa, so hooray for safety features! Their self-healing mat was amazing, too.


Tomorrow, the pool! I'll be sure to post a photo of the beach towel tote "in action!"
Subscribe to:
Posts (Atom)